full screen background image

Wednesday 29 June 2011

June Hump Day Hop: "Shiver Me Timbers!"

Hello Bombshell fans! Alison here, bringing you the latest Hump Day Hop. This month's theme was:


Shiver Me Timbers!


Aaaarrrggg!!!! In honor of the latest Pirates of the Carribean flick, and the start of Summer (cruises and such...work with me here, folks) I decided what better theme than pirates! More like the phrase "Shiver me timbers!" Now, I am thinking pirates...but what do YOU think of when you hear that phrase? :twisted:

Of course, Pirate's Life and Homeward Bound work purrrfectly with this theme...but if ya don't have those...no worries! There is plenty you can do with some of the other sets!

Now, doesn't that sound exciting? Aren't you excited to see what everyone has created? I know I am!


Here is the entire hop list. I hope you visit everyone, as I know you will be wowed by all of the creations.


Bombshell Blog < you are HERE!!!
Alison


Enjoy the hop! And remember, I will be announcing the next Hump Day Hop theme right here on July 1st!

Monday 27 June 2011

Wild Thing Part 2

    I have been a Bad Bombshell and didn't get my June challenge card done in time to include with the original Wild Thing post.  To make up for my naughtiness, I have decided to post my very late Wild Thing now.
     I love leopard print and just happened to have some leopard paper at home so I knew I would be using that and the Cherry Bomb girl just looked like a wild thing to me with that bikini so....
     One of the other Bombshells put the song "Wild Thing you make my heart sing" (thanks very much. not.  still stuck in there) and with the idea of Jane as in Tarzan and I went with the inspiration.  The heart was a Spellbinders Nestabilities that I embossed with a leopard embossing folder (told you I had leopard stuff) and I added some Stickles to give it some zing.  A few rosettes, some more Stickles, a little netting and ta-da Wild Thing.

Friday 24 June 2011

Bombshell Bottle Cap Necklace

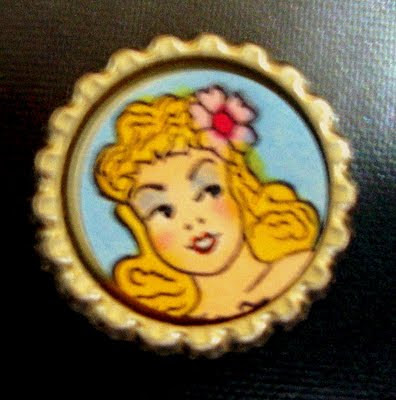
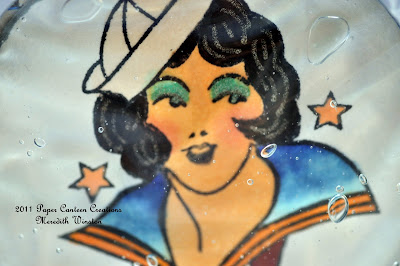
 This is my very first tutorial for a simple project that is loads of fun.  You can do so much with this little bottle cap bombshell.

Here are a list of the necessary supplies:

Bottle cap
Rubber Mallet
Bombshell Stamp
Coloring Medium of Choice
Glossy Accents
Necklace Bail
1" Hole Punch
Ink Pad
Card Stock
To begin this project you will need to flatten your bottle cap.  Use the rubber mallet and whack the cap hard against a stable surface.  I can use my sturdy craft desk but I have also done this out on the porch. This step is not necessary if you prefer to use the inside of the bottle cap and not flatten it.

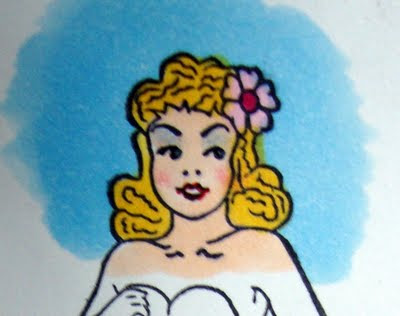
Stamp your chosen bombshell, Bombshell Angel onto card stock.  We will only be using her head for this project.


Color in the portion of the image you will be using.  Do not forget to color around her head as that will be your background.
Next, punch out the head.  Center the image in your punch by using your punch upside down.
 Glue the image to your bottle cap using the Glossy Accents.  Use which ever side of the bottle cap you prefer.  
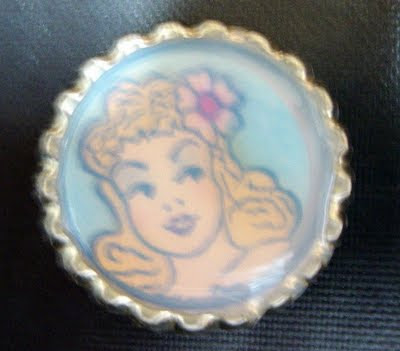
After gluing the image to the bottle cap cover it with Glossy Accents.  Slowly squeeze the glue bottle till the image is completely covered and the glue has reached the side of the bottle cap.  Do NOT over fill the cap with glue.   This step is the longest as it takes several hours or over night for the glue to completely dry.  Do not be tempted to touch your image to see if it is dry; you will leave finger prints. (Ask me how I know.)  When the image is clear the glue is dry.
The final step is to glue on the necklace bail.  Turn the bottle cap over glue the bail on using the Glossy Accents.  I place my bottle cap on an acrylic block or wooden stamp so that it is not lying flat. This allows the bail to glue on evenly.

After the glue has tried.  String your new Bombshell charm onto a chain or ribbon and wear proudly.


Wednesday 22 June 2011

Rise and Shine, Valentine!!!


Today, I am sharing this card that I made using this awesome set called ... RISE AND SHINE... and how freakin'cute is this?I tried to make the outside look like a ship with a porthole on the outside...I tried to make it look rusty too!!! And inside the porthole is the sun...as you can see!
and then on the inside, I put this Hot babe in the hammock that I feel certain ANY sailor would love to see on his bunk...LOL!
I sponged the clouds and then I cut out the hammock gal and added her with brads... and here she is in all her glory!

Thanks for popping in and have a wonderful day!

Tuesday 21 June 2011

July 4th is rapidly approaching!

If you're not signed up for Bombshell's newsletter, you might want to hop on over and sign up now for a chance to win a $100 shopping spree!

The lucky winner will be selected on July 4th!!!

Here's a link!

Sunday 19 June 2011

Father’s Day Card

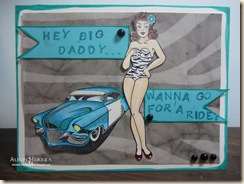
Greetings! Alison here. It’s Father’s Day. I’m usually pretty sad today, as my Dad has been gone for 10 years now…and my Father in Law is now gone as well…but my husband Gene and I are working on fixing up some things around the house, so I’m doing much better this year than I expected. I made him a card using some Bombshell Stamps, and I made it to coincide with this month’s Pin-Up challenge: Animal Print.
 
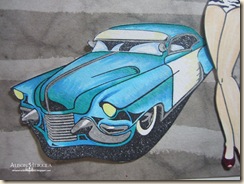
I just got the Speed Shop set in the mail last week, so I was really excited to start using it. And I just had to include one of my favorite Bombshells…Bombshell Angel!

I drew in the zebra print on her outfit, and used some zebra print paper in the background.

I love how the car turned out. I used a lot of shades of blue to color it in, and I am really happy with how it turned out. Don’t these two images work great together?
My husband loved the card. Which makes me happy. What do you think??? Reminder: you still have some time to sign up for this month’s Hump Day Hop! Stop by the forum to join in! Thanks for stopping by. Have an inspiring day!

Friday 17 June 2011

Come Swim With Me...Gel Card Tutorial

Good Morning Gorgeous Bombshells!!!  Lucky, Lucky you ladies!!!  Today you get the pleasure of not only ONE Bombshell Tutorial but TWO Bombshell Tutorials!!  Yep!  That's right...we're doubled up today on amazing coloring skills and a super snazzy card!!!  
My tutorial today is going to teach you how to create a card using gel.  Yes, you heard me right..straight up, old school, clear hair gel.  It will make whatever image you place behind it seem as though it's floating in water! So cool!!!  It is a fantabulous card style for a fun tag plus it can be used as a nifty gift card or cash holder if you wanted to give those as a gift!!

The first thing I did was print out the template. I then scored and trimmed my paper at the measured amounts:

I then scored vertically at 5" then at 8" leaving you with 3 sections measuring 5", 3" and 2.75".
You will then score in 1" on each side and trim the 1" pieces on both sides of the 5" section and the 2.5 " section. Leaving the 1" side tabs on either side of the 3" section. (these will be your tabs that will hold your pocket in place later.)  I then scored on all lines making sure that every line was nice and crisp.
I added my SEI brand designer paper to the larger panel that will be your background.  You want to then fold the flap inward that that it matches the back panel.  The two tabs will wrap around the back of your card securing everything in place.  You want to then decorate the front section of your card.  You will want to adhere your background and front papers at this time.

There is no window yet...don't worry.  You haven't missed a step.  =)
Your next step will be to punch out a window.  You will do this by folding the two smaller sections together.   Keep your tabs out to the sides for now.  Don't get them into the mix yet.  Choose your punch.  Make sure you use a heavy duty and good quality punch so that you can get through all layers.  The reason that it's best to do all layers at the same time is to ensure that everything lines up exactly.  After choosing your punch you will slide both pieces, so you'll have your decorated DP front panel as well as it's mate in the back, in your punch at the same time.  Ready, set, PUNCH!  =)  Now you will have two pieces punched with the exact same shape.
The next part is adding the gel. My suggestion is to use a tiny zip top bag such as the kind the extra button comes in when you buy a sweater or the ones you can buy at beading stores, etc are the best for this project.  You only need a very small amount of gel - approximately a teaspoon or so otherwise it won't fold flat and will push your paper out too much.
Next seal the bag.  Gently push the gel around a bit to make absolute sure that your bag is sealed.  It'd be a shame to have gel squish out and ruin your beautiful work!!!  In my example today I found that my zip top bag was to large for my project so I had to trim it down.  No worries...I zipped it through my sewing machine and it was sealed well.  It doesn't look too pretty but that's ok...no one will ever see it.  I also ran out of liner tape otherwise I would have sealed it up a bit easier with that.
You want to add liner tape or flat glue dots along the insides of the circular window, as well as on the small tabs to the left and right of your window. These will wrap around and hold everything in place.
Once your liner tape is in place you can adhere your gel pack to the inside of the card. You then want to fold up the front of the "pocket" and adhere.
You will then flip your card over, fold the front piece (with the gel) up and wrap the tabs around the back of the card adhering them.  You can see in the picture above, in the lower left hand corner the tab that's wrapped around and adhered to the back.
Now comes the insert!!  I measured my "tag" that is the insert to my card.  This measures roughly at 4.5" x 3.75". I chose to use my pinking shears for the corners of my tag.   Today I'm using my brandie new Ahoy Sailor set.  LOVE IT!!  There are 11 stamps in this set.  11!!  It's awesome.
When decorating my tag, I chose to use the same size punch as I did when I punched my window.  That way I was also ensuring that my image would peek through the "water" aka gel window perfectly.  I held everything in place before I actually adhered it to my tag JUST to make sure she wasn't crooked or tilted in any way.  I colored my Bombshell using my Copics, Souffle and Sakura gel pens.

I used all manner of designer papers and cardstock that were simply lying around on my workspace.  I used the knot stamp to embellish the top of my tag and added an SU! jumbo rivet to the top.  I used my very last piece of vintage (true vintage) *sniff* ribbon as the pull tie for my tag.  Even though it didn't "match" per say it fit this project perfectly. 
I added a layer of homemade ruffled ribbon around my scalloped base.
I then decorated the back of my tag using the Hold Fast sentiment banner while leaving space to write a little message to the recipient.  Now all that's left to do is slide your tag in so that your image faces outward and VOILA!!  What a cool card to receive!!!


If you have ANY questions regarding this tutorial, or need clarification on how to work this please do not hesitate to leave a question in the comment section and I will be sure to respond!!

I do want to thank the amazing gals at PTI for creating the template displayed above and having this great idea years ago!!  I borrowed this, added my own touches and can now teach you how to do it!!  =)

I hope you all have a beautiful, creative and very inspiring weekend!!

Crafty Hugs!
Meredith

Hose her Down Boys! - - Hose Coloring Tutorial

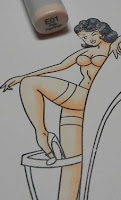
Hey there all, and welcome back to another Bombshell Tutorial. One of the things I LOVE about my Bombshells is that I get to dress them with my Copics, and although hose seem to be in the OUT instead of IN fashion wise, I really have fun coloring those sheer things.  There is a difference however, in coloring things that aren't sheer and things that are, and that is one of the really beautiful things about Copics - you can layer your color, and get blending, or you can layer completely different colors and make some of the color shine through. Take the hot Girls Ruin Lady (ok, so I cheated on this one, because she had ready made hose drawn on her.)

I start out coloring her entire body as if she is naked. In fact my 11 year old walked by me tonight and said "MOM!!!!! Put some clothers on her!" Sorry, but this is how I do it to make sure that there is skin showing through. Or sometimes I don't... LOL... but that is for a completely other blog post!

Cheryl showed you how she colors dark to light, and I do the opposite, I color light to dark. I start out by coloring the entire image in E000, and then add in E00 and E01 in layers.

I go back and blend them out, and then add in the "sunburn" with R20. I showed that image non-blended, because I wanted you to see where I added it and how little it is. But afterwards, I blend it in with the lightest E color I used - in this case E000.

Once all these are colored I start with the hose and bra. I usually go with the Cool Greys to make them look like they are black, but sheer. I am going to play soon with some other colors... but to make this work you MUST have light colors from the family. I start out as if I am coloring over plain white, and layer them in. So, for this, I pretend the skin tone is not there, and color as if grey is the only colors I am using. C0, then C1 and C3 layered in and a little blending. Then C5 added on, and then I back off through the colors - C3, at the edge of the C5, C1 at the edge of the C3 and then a blend of the C0 over the entire area.


Once she is all blended up, I use either the Brush multiliner, or a small tip multiliner to add in dimension on the top of the hose and the bra so that it looks like lace. You can go really crazy here. I have done (and seen many others do) fishnet hose. I like to go kind of squiggly a lot and make it look more lacy. I also like to add lace and / or ruffles at the top of the hose and or bra.
That is just one of the BEAUTIFUL things about these Bombshells, you can change them up to make them all yours.

Here is a pic of her all finished up, I have a pic of the full card up on my personal blog if you are interested:

I hope you had a good time, and I hope I was able to convey how I do this to all of you. Please check out our two challenges this month, they are wonderful and you have a chance to win some gorgeous new Bombshell Rubber!

Come back next Friday for another Educational Session!

~~~ Alaine


Thursday 16 June 2011

Hey Big Spender...

OHHHH... how much more could I love this Sugar Daddy set from Bombshell? I LOVED coloring it and embellishing it and just giving this guy his personality! It was really fun to make the money look like he was just throwing it all around...(my kinda guy...LOL) and holding his winning hand!
I used crystal effects on his eyes,nose and tongue to give them a realistic look. I added the rhinestone ribbon slide to compliment his flashy wardrobe and here he is... in all his glory! Thanks for popping in and have a great day!

Wednesday 15 June 2011

Grrrr.... Wild Thing!

Hi there, and HAPPY WEDNESDAY!!!!
Ms June here with my monthly challenge!


For my Challenge I chose a theme of being WILD! So feel free to channel your inner animal, break out your lovely ladies, and their friends and use some ANIMAL PRINT.


Here are some wonderful examples featuring this CHALLENGE.


Emily using the Bombshell Angel for the "Cat's Meow"


Emily using the Bombshell Angel (again) for a "Peacock"


Meredith using Rise and Shine


Kathi's using Bombshell Patterns & Lucky Bride!